
Welcome everyone to my contribution to this year’s Festive Tech Calendar. Thanks, as always, to the event organisers who put this event together. It’s always great to see such amazing and varied content each December throughout the tech community.

This year, I’ve picked a classic solution that I still turn to time and time again. The scenario is simple: you have an internal application that you want to publish to users who may be working remotely, i.e. not connected to the application via a private network.
Traditionally, this solution would require a VPN connection but this has dependencies on infrastructure, licensing and let’s not even get started with support and troubleshooting of VPN clients.
Today, we have several options available to us. This post will focus on two such options. Namely, publishing via Entra Application Proxy and also by Entra Private Access. These two solutions both achieve the same result but there are some key differences between the solutions that I will explain in this post.
Let’s start with a brief overview of each solution:
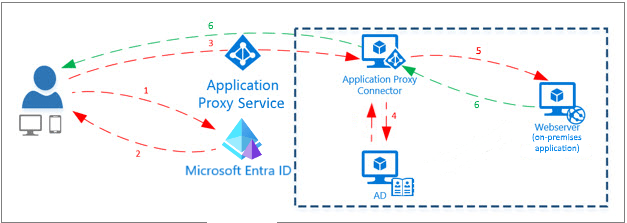
1. Entra Application Proxy
Entra Application Proxy is a cloud-based service that allows you to securely publish internal web applications to external users without requiring a VPN. It works by installing a lightweight connector inside your network that establishes an outbound connection to the Entra Application Proxy service. When a remote user accesses the published app, the request is routed through the proxy, authenticated via Entra ID, and then securely forwarded to the internal application.
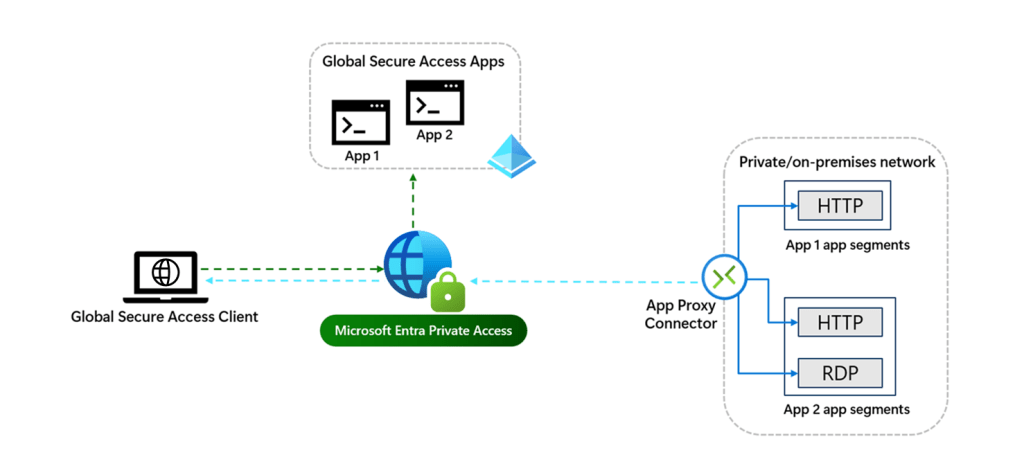
2. Entra Private Access
Entra Private Access takes a different approach by enabling Zero Trust Network Access (ZTNA). Instead of exposing applications through a proxy, it provides secure, identity-based access to private resources over an encrypted tunnel. Users connect through an agent called the Global Secure Access (GSA) agent, which dynamically enforces access policies based on identity, device compliance, and context.
What are the differences?
In a nutshell, Entra Application Proxy securely publishes internal web apps via a public URL, while Entra Private Access provides identity-based, Zero Trust access to any private resource (not just web apps) without exposing them to the Internet.
Here’s a table of some key differences:
| Feature | Entra Application Proxy | Entra Private Access |
|---|---|---|
| Access Model | Reverse proxy publishes internal web apps externally | Zero Trust Network Access (ZTNA) to private resources |
| Connectivity | Outbound Connector inside target network to Application Proxy service | Outbound connector + GSA agent creates secure tunnel to Microsoft edge |
| Use Case | Web-based apps (HTTP/S only) | Any TCP/UDP app (web and non-web) |
| Authentication | Entra ID with Conditional Access | Entra ID with granular, context-aware policies |
| Infrastructure Needs | Windows Server Connector agent on target network | Windows Server Connector agent on target network plus endpoint agent |
| Security Approach | Reverse proxy with pre-authentication | Identity-driven, context-aware access |
| Published URL | Requires public URL (custom domain or *.msappproxy.net) | No public URL required; uses secure tunnel |
| Ideal For | Quick publishing of internal web apps | Secure access to mixed resources without network trust |
| License Requirements | Microsoft Entra ID P1 or P2 | Microsoft Entra Suite |
For this blog, I’m going to run through setting up both options first of all and then I’ll conclude with my own thoughts on where each solution can be best utilisied.
Common Components
Regardless of which solution you decide to use, you will need a connector agent that sits inside your target network, that is to say the connector must have direct access to the target application that you wish to publish. The good news is that both solutions make use of the same connector agent so even if you decide to use both solutions, they can share the same connector agent. This must be installed on a Windows Server 2016 (or higher) device and TCP ports 80 and 443 outbound must be opened. Microsoft recommend to have at least two connectors deployed to different devices for resiliency.
You’ll find the connector download in the Entra portal under Global Secure Access -> Connectors. Simply download to your intended connector server and install.
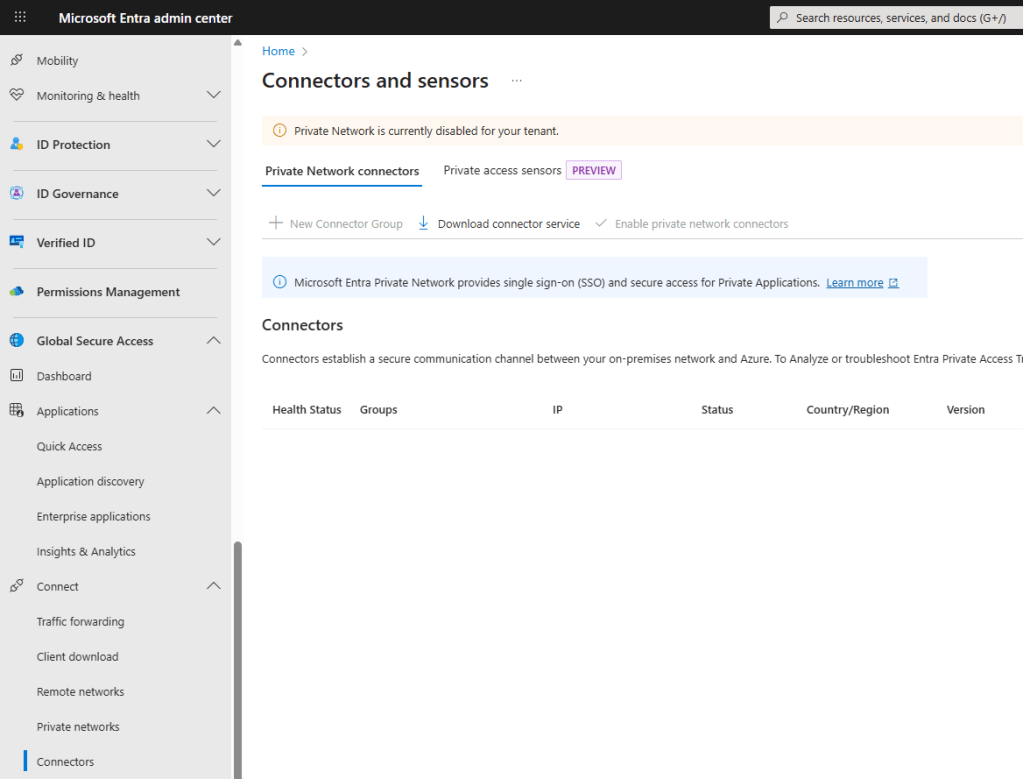
Once registered, you will see the connector appear in your list.
Note: You can create multiple connector groups for different apps but let’s not worry about that for this post and we will just use the ‘Default’ group.

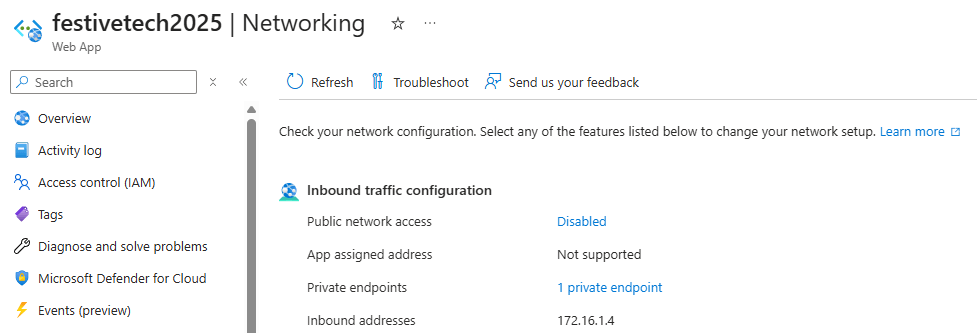
For my example, I am going to publish a simple web application that I have created for this post. This will be privately hosted on an Azure App Service by using a private endpoint with the public endpoint disabled. This means that my web app can only be reached via its private IP address. The connector that we just deployed will have access to this via Azure Virtual Networks but my client endpoint will not. I will be accessing this web app from a completely isolated environment over the Internet.
Below you will see my app service is deployed and has public network access disabled. Private access is available via a private IP address of 172.16.1.4.
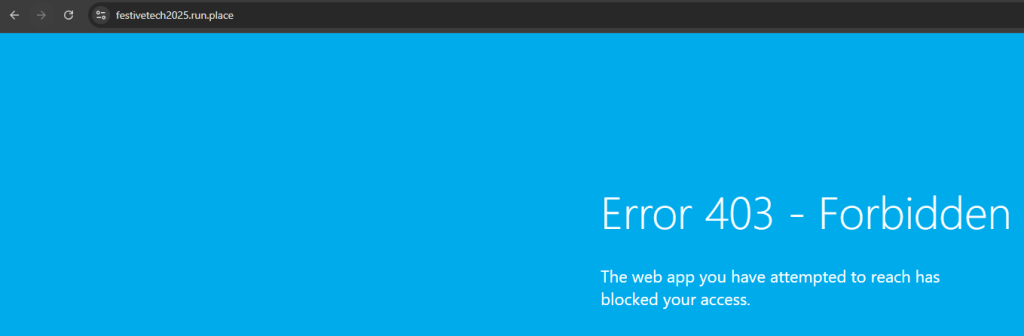
For my demo, I will be using a custom domain of http://www.festivetech2025.run.place which right now I have pointed via a CNAME record directly at the App Service.
If I browse to this, I will see that I am blocked as the public endpoint is disabled.
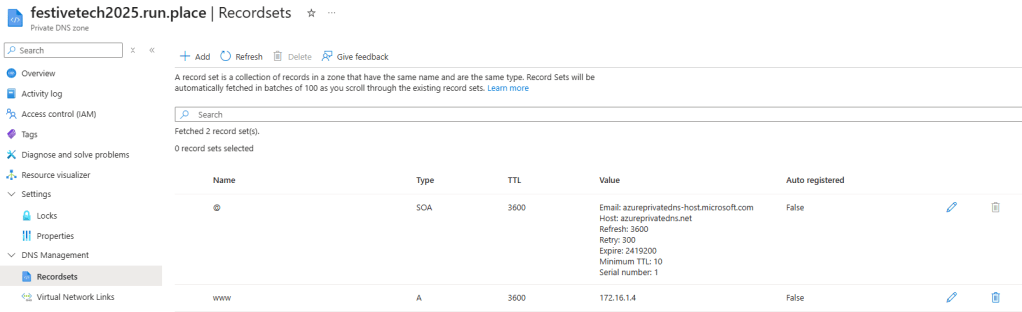
As I am using a custom domain for my web app, I need to be able to resolve this domain name in order to access my resource. This name resolution will be performed by the connector agent so the server where this is deployed needs a DNS record for http://www.festivetech2025.run.place. There are several ways to achieve this but as my solution is Azure based I am going to create a Private DNS zone called festivetech2025.run.place.
In this zone, I add an A record called www and point this to the private endpoint of my App Service which is 172.16.1.4.
The next step is to add a Virtual Network Link so that I can link this DNS zone to the Virtual Network where my connector server is deployed. This looks like this in my demo.

My task now is to publish this application so that I can reach this externally even though it’s an internal application. Let’s first start with the Entra Application Proxy method.
Microsoft Entra Application Proxy
Firstly, I want to mention that this service has been around for a long time. That doesn’t mean that it’s not a good solution or not secure, in fact this is a solution that I still use quite regularly when it comes to web apps. I’m often surprised at how many people either aren’t aware of or have simply forgotten about this service. I’ve actually torn up complex VPN style solutions that were completely unnecessary and replaced them with Entra Application Proxy.
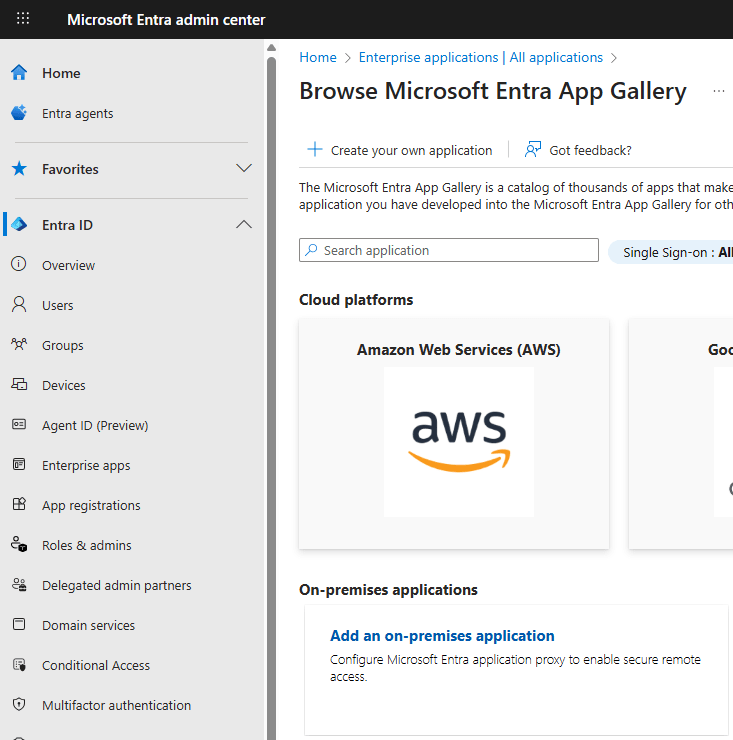
We start by creating an Enterprise Application in our Entra tenant. This can be performed either via the Entra portal or the Azure portal. I’ve chosen to use the Entra portal here.
Go to Entra ID -> Enterprise apps -> New application -> Add an on-premises application
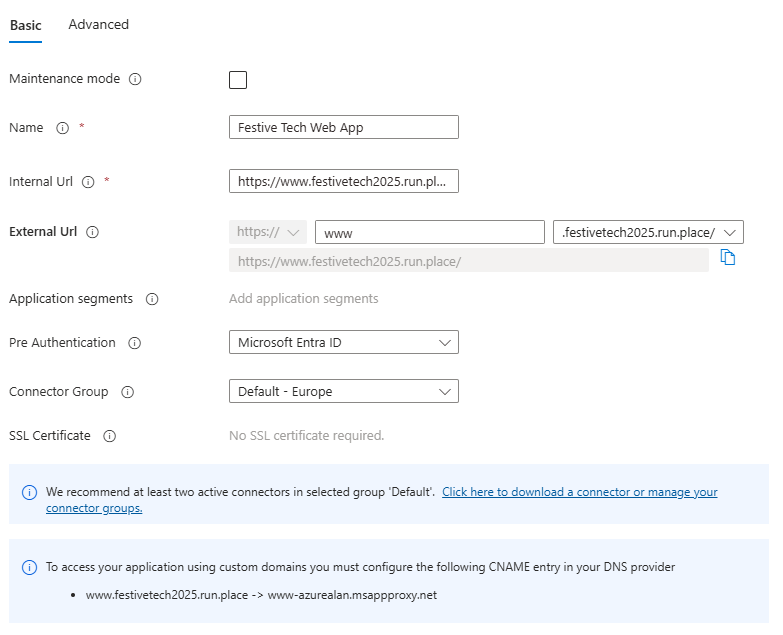
Next, you need to complete the application details:
Name: The name of the Entra app that you are creating – Festive Tech Web App
Internal URL: The internal URL of your web application as known by your connector agent. As I have created an internal DNS record for this already this will be: https://www.festivetech2025.run.place
External URL: You must use a publicly addressable URL. You can either choose a .msappproxy.net URL or add your own custom domain. As I am using a custom domain then I add my publicly resolvable custom domain here: http://www.festivetech2025.run.place
Note: For custom domains, these will need to be added and verified in your Entra tenant first.
Pre-Authentication: Microsoft Entra ID (this means we will authenticate to the Entra service itself before forwarding to the web app – highly recommended).
Connector Group: Default (this is the connector group name where your connector agent is deployed)
SSL Certificate: If you are using a custom domain (like I am) then you need to add a public SSL certificate here. This must be done after creation of the enterprise app.
We can now click ‘Create’ to create our Entra Enterprise application.
Now, let’s go back in to our enterprise app and add the SSL certificate.

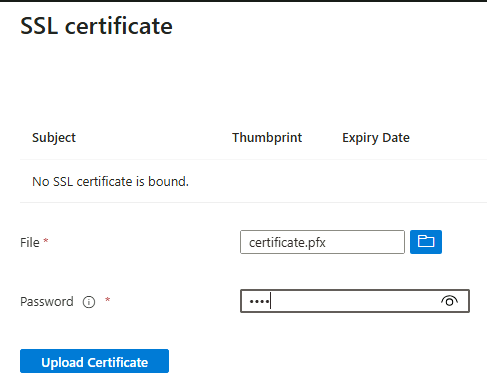
With the certificate added, the enterprise app setup is complete.
Note: This SSL certificate is also bound to the same custom domain on the App Service itself.
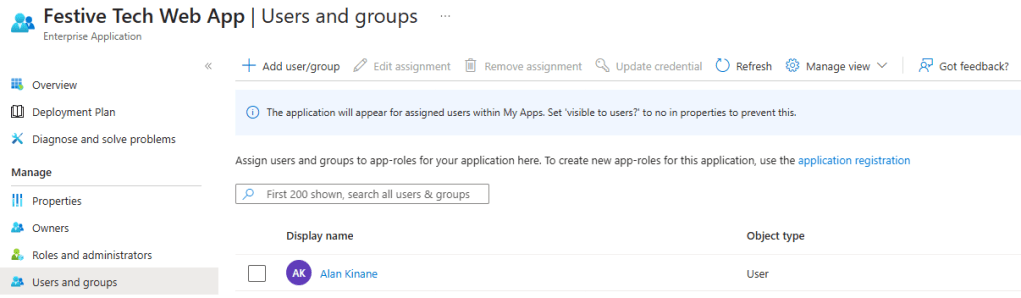
In order for my users to access this web app via the Application Proxy service, we need to assign this application to them. This can be done from the Users and groups section of the enterprise app by adding any users or security groups required.
Finally, we need to publish our enterprise app. Remember, my custom domain is currently pointing directly at the blocked web app. Well, now we need to change this so that it points at the Application Proxy service instead. You may have spotted the below in one of the previous screenshots. This tells you the new CNAME record that you need to put in place on your public DNS service.

After updating the CNAME record and allowing time for propagation, I can try accessing my web app externally.
The first thing I get is an authentication screen. This is good as it means I’m hitting the Application Proxy service and the pre-authentication condition to authenticate via Entra ID.
Note: If you are already signed in then you won’t see this unless you have specific conditions configured.

I proceed to authenticate and then I am successfully proxied to my web app via my custom URL.

Overall, a fairly simple solution to implement in my opinion. It is however limited to web apps only and you must have a publicly resolvable domain name in order to reach your web app.
Let’s now look at publishing the same web app but using Microsoft Entra Private Access.
Microsoft Entra Private Access
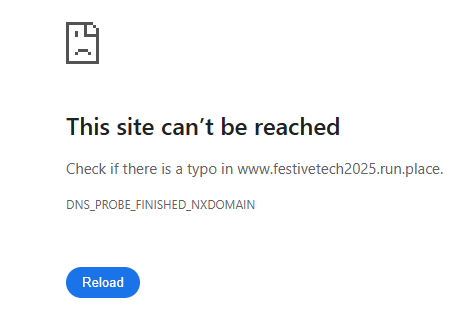
We still have our common components in place from before. Specifically, the private web app, the private DNS zone and the connector service. The key difference here is that we are not publishing a publicly resolvable URL and we can prove this by first removing the public CNAME record from the last exercise and browsing to our web app – https://www.festivetech2025.run.place
As you can see, we can no longer resolve this URL as there is no public (or private outside of my network) DNS record.
As Entra Private Access requires an agent to be deployed on the endpoint device trying to access the internal resource, we must first create the application. This process is remarkably similar to the previous process we followed to create an enterprise app.
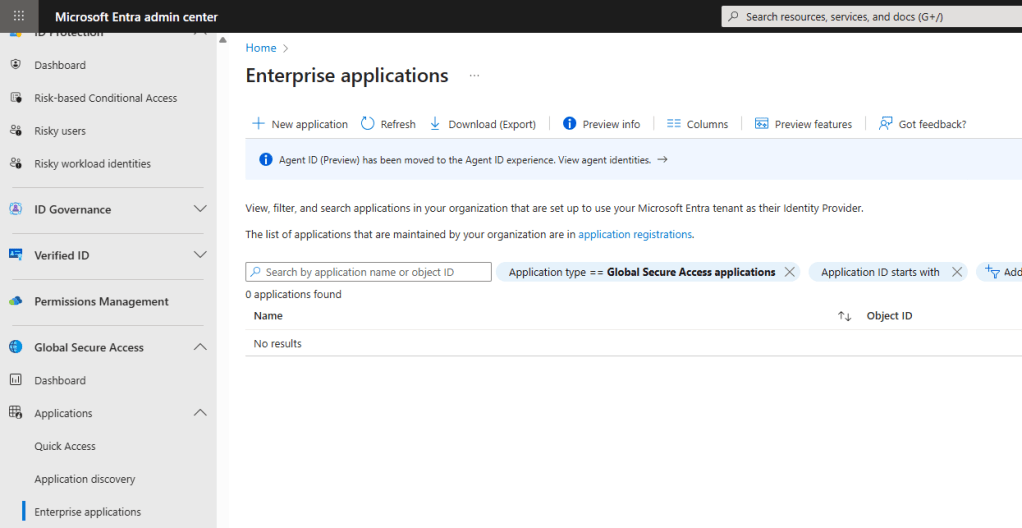
Once again we go to the Entra portal and this time to the Global Secure Access section and click on Enterprise applications. Click on New application.
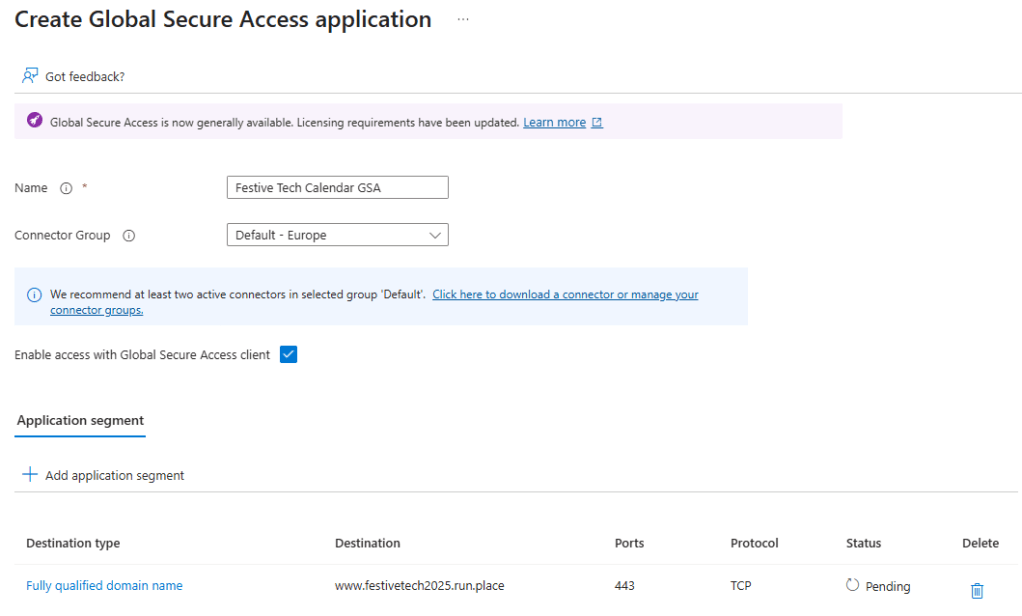
The same as before, we need to give our enterprise app a name and choose a connector group. Make sure the checkbox is ticked to allow the GSA client to access this app.
We also need to add an application segment here, this is how the application is accessible from the connector service. This can be a single IP address or address range or else an FQDN. You must also specify the port number(s) and protocol(s) as remember we are going beyond just support for HTTP/S here. In my example, I will add my usual internal DNS FQDN of www.festivetech2025.run.place and I want to use TCP port 443 (HTTPS). Make sure to click Save to create the application.
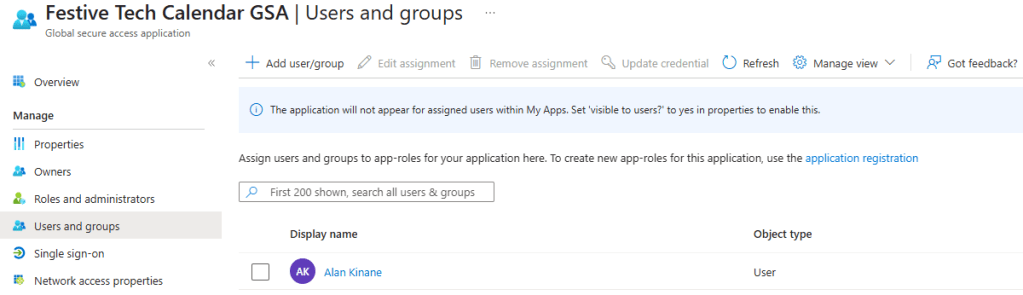
This will take a few second to validate and then as before you will need to assign access to the required users or groups.
The next step is to go to Global Secure Access -> Traffic forwarding in the Entra portal and enable the Private access profile as shown below.
Your GSA assigned application should be listed in the Private access profile section and then you also need to click on the User and group assignments section and assign the traffic forwarding profile either to all users (as I have) or to selected users or security groups.
Enable the profile using the slider button, then wait a few minutes for it to be published. Any subsequent changes here will also take some time to reflect on the GSA enabled client devices.

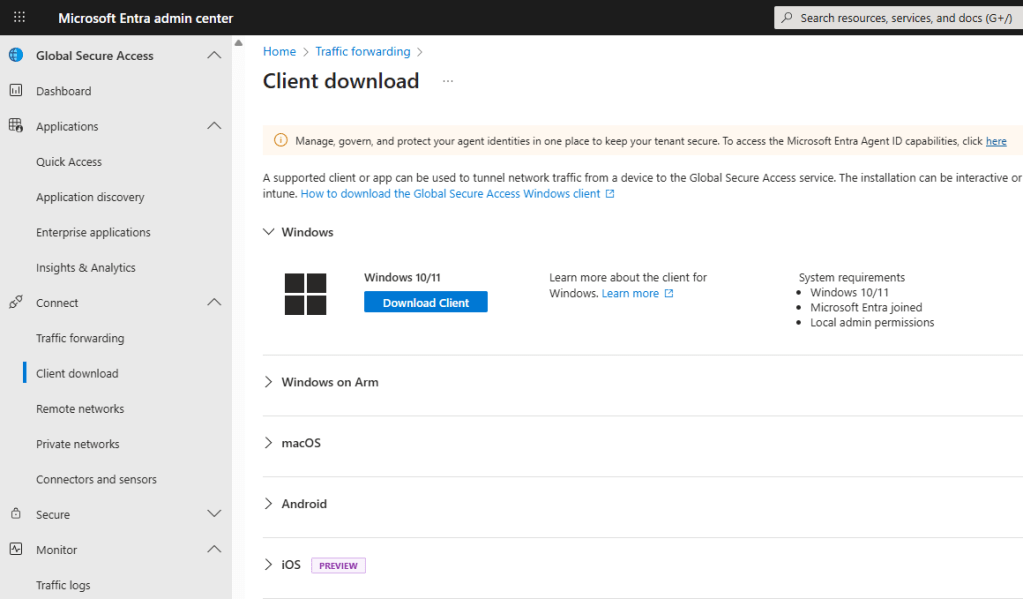
Now it’s time to enable our client device with the GSA agent. We will need to download and install the GSA agent to our device so for this demo let’s perform this manually. You will find the client downloads under Global Secure Access -> Client download.
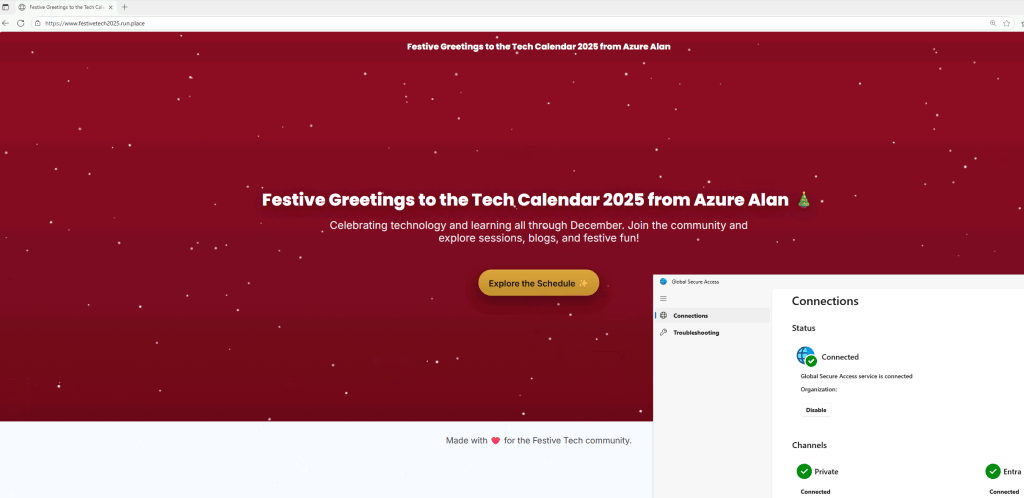
Once the agent is installed and authenticated, after a few minutes you should see the client status is connected as shown below.
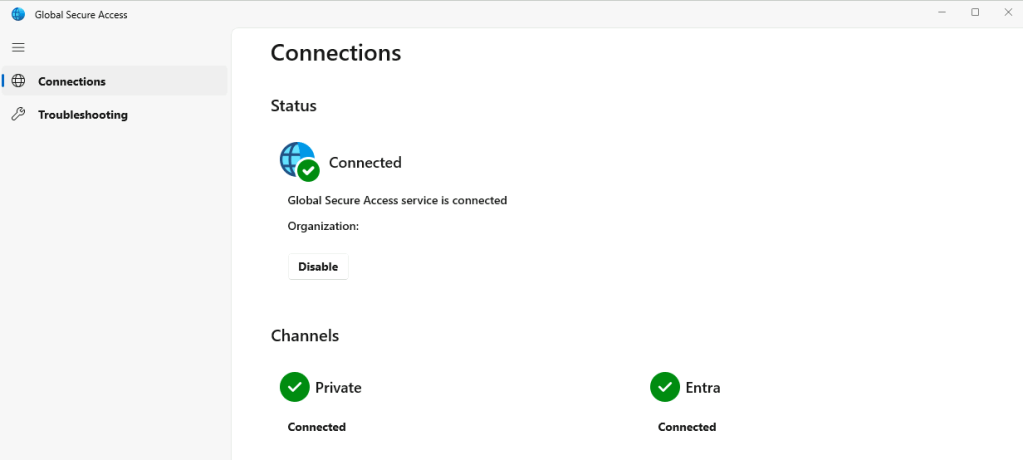
As you can see, we can now successfully reach our private FQDN over TCP port 443 (HTTPS) via the GSA agent. This device is securely tunnelling through the GSA agent and without a public DNS record.
As another very quick demo, lets see how easy it is to publish another application but this time a non-web app. Below is an example of how to publish an RDP connection over TCP port 3389 to a VM that my connector server has access to.
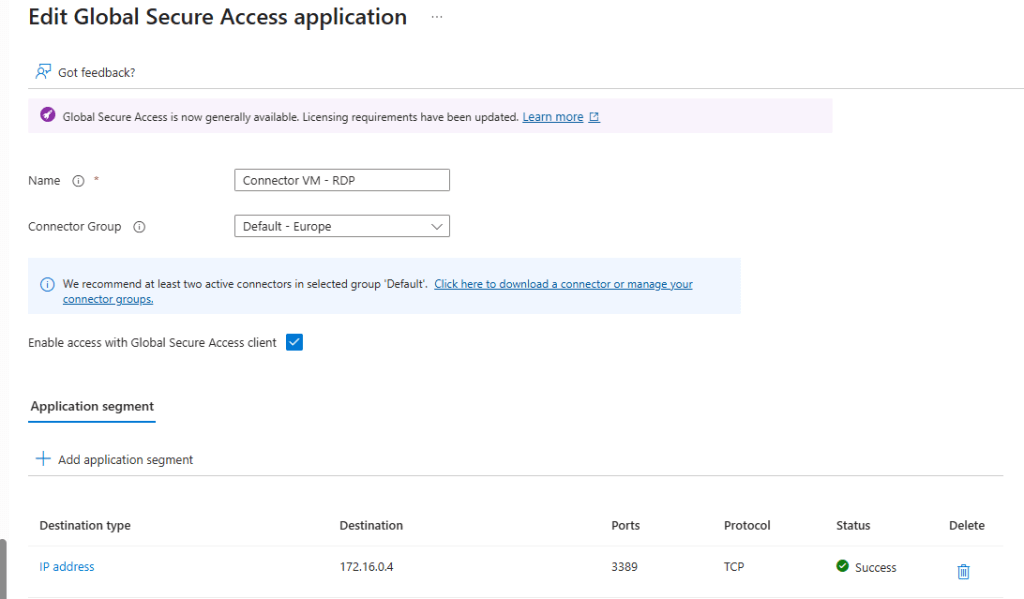
Once published and assigned to my user account, I can now RDP to this destination endpoint from my client device with the GSA agent installed. Fantastic!

Security Hardening
We’ve now looked at both solutions and seen how we can successfully access internal resources from an external endpoint device but how secure is this?
Both solutions rely on Microsoft Entra authentication, which means you can apply Conditional Access policies to enforce identity-driven security before any traffic reaches your internal resources. This gives you the ability to enforce critical security controls, including:
- Require Multi-Factor Authentication (MFA)
- Enforce device compliance so only managed or healthy endpoints are allowed
- Block access based on sign-in risk, geolocation, or session context
For more details, see Microsoft’s documentation on configuring Conditional Access.
Let’s say you want to filter the traffic between your external users and your internal app. You should consider routing traffic through a firewall for additional inspection and control.
For web apps, you might want to introduce a Web Application Firewall (WAF), this can be deployed via an Azure Application Gateway which is a virtual network integrated layer-7 load balancer with WAF capabilities. For non-web apps such as the RDP connection from our example, you might want to route traffic through Azure Firewall or a Network Virtual Appliance (NVA).
To send the traffic to the Firewall service instead of directly to the application the only change required in my example would be to update the private DNS zone’s www record to point to the private IP address of the Firewall instead of directly to the App Service. The Firewall will be configured to filter the traffic and forward to the App Service.
Key Takeaways
If you’ve made it this far, we have explored two powerful options for securely publishing internal applications to external users without relying on traditional VPNs. Below is a quick summary of the main points from this post to help you decide which solution best fits your needs.
Two main options for publishing internal apps externally:
- Microsoft Entra Application Proxy: Ideal for quick, secure publishing of internal web apps using a public URL and reverse proxy with pre-authentication
- Microsoft Entra Private Access: A modern Zero Trust Network Access (ZTNA) solution that supports any TCP/UDP application via an identity-driven secure tunnel
Common Components:
- Both solutions require a connector agent deployed inside your network with access to the target application
Application Proxy Highlights:
- Simple to implement for web apps
- Requires a publicly resolvable domain and SSL certificate for custom domains
- Authentication handled by Microsoft Entra ID, enabling Conditional Access
- Best suited for organisations with web-only publishing needs
- Requires Entra ID P1/P2 licensing
Private Access Highlights:
- No public DNS required; access is via secure through through GSA agent on client
- Supports non-web apps (e.g., RDP, database connections, SMB shares etc.)
- Requires Microsoft Entra Suite license
- Aligns with Zero Trust principles and integrates with Entra Internet Access for Secure Web Gateway capabilities
- Best suited for organisations with mixed application types or Zero Trust adoption goals
Security Considerations:
Both solutions leverage Entra ID authentication, allowing Conditional Access policies:
- Enforce MFA.
- Require device compliance
- Block access based on risk, location, or session context
Additional hardening options:
- Route traffic through Azure Firewall/NVA or Web Application Firewall (WAF) for inspection and filtering
Conclusion
So which solution should you use? Well, like everything, it depends…
There’s no question that Entra Private Access is the modern solution and may eventually replace Entra Application Proxy completely but I don’t see that happening for some time yet.
The fact that Entra Private Access supports more than just web apps makes it a strong candidate but not if you only have web apps to publish to your users. The additional licensing overhead can also add a significant cost if you have a lot of users in scope and let’s not forget that you need to deploy and maintain the GSA agent on every device. That said, the GSA agent can also be used for another service that I didn’t talk about here – Microsoft Entra Internet Access. This is a cloud-based Secure Web Gateway allowing you to apply web content filtering as well as threat protection and TLS inspection via the same GSA agent.
In short, if you are likely to only need to publish web apps then Entra Application Proxy is still a go-to solution in my book. However, as we move more and more to zero trust security then Entra Private Access is likely to become a leading solution especially if coupled with Entra Internet Access which is included in the same Microsoft Entra Suite license plan.
