
I’ve been waiting for this one for a long time so I was very keen to get stuck in with a deployment as soon as the public preview was announced late last week.
Firstly, why is this important?
Although many of us have now migrated file based sharing solutions over to the likes of Sharepoint document libraries or similar technologies there are still a lot of organisations out there with a lot of data still sitting on traditional SMB based file shares on premises. I speak to customers regularly who are keen to replace on premises servers and move everything to the cloud but when it comes to moving the file shares often the solution has not be thought through fully.
If you are simply moving from a Virtual Machine based file share on-premises to a cloud hosted Virtual Machine based file share then what are the real benefits? Sure, you won’t have to maintain the underlying infrastructure but there is still the Virtual Machine to maintain, it has just moved to another location.
Azure files offers a serverless based alternative. You can map a network drive directly to an Azure file share via the standard SMB protocol. This is great, but the issue has always been around permissions. Usually with file shares there will be a requirement to have different permission levels set on different folders, e.g. only the finance department can access the ‘finance’ folder and so on. Up until now it hasn’t been possible to lock down Azure files shares in this way with the exception of accessing an Azure files share via an Azure Virtual Machine joined to Azure AD Domain Services.
In other words, you would map a drive to the file share using a storage account access key and everyone would have full access to everything within that file share. This was a deal breaker for most customers I spoke to and most have either gone with another solution or have patiently been waiting for Active Directory authentication to arrive. That time is now!
Prerequisites
A few important points to note here:
- Your endpoints will need to be domain or hybrid domain joined in order to authenticate with this service
- Your Active Directory must be synced with Azure AD in order to authenticate the identities
- Your Azure files share must be created on the same synced Azure AD tenant
The following regions are not supported for the preview so create your storage account in a region other than those listed below:
- West US
- West US 2
- East US
- East US 2
- South Central US
- West Europe
- North Europe
Configuration
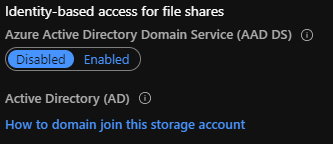
I’m going to skip over the basics here but once we have our storage account and a file share created in one of the supported regions we now need to enable this for AD authentication.
Note: This is not the same as Azure AD Domain Services. In fact, it is important that this is left on the default disabled setting as you can’t configure both this and Active Directory authentication simultaneously.
In order to enable Active Directory authentication we will have to download a new PowerShell module here and register the storage account against your Active Directory.
The below is a template for doing this.
#Change the execution policy to unblock importing AzFilesHybrid.psm1 module
Set-ExecutionPolicy -ExecutionPolicy Unrestricted -Scope Currentuser

# Navigate to where AzFilesHybrid is unzipped and stored and run to copy the files into your path
.\CopyToPSPath.ps1

#Import AzFilesHybrid module
Import-Module -name AzFilesHybrid

#Login with an Azure AD credential that has either storage account owner or contributer RBAC assignment
Connect-AzAccount

#Select the target subscription for the current session
Select-AzSubscription -SubscriptionId "<your-subscription-id-here>"

#Register the target storage account with your active directory environment under the target OU
join-AzStorageAccountForAuth -ResourceGroupName "<resource-group-name-here>" -Name "<storage-account-name-here>" -DomainAccountType "<ServiceLogonAccount|ComputerAccount>" -OrganizationUnitName "<ou-name-here>"
Once provisioned correctly you should see a confirmation message like the below:

This will also create a new computer account on your Active Directory which is used to manage access to the Azure files share.
You should then run the below code snippet to confirm the feature has enabled and configured successfully.
#Get the target storage account
$storageaccount = Get-AzStorageAccount -ResourceGroupName "<your-resource-group-name-here>" -Name "<your-storage-account-name-here>"

#List the directory service of the selected service account
$storageAccount.AzureFilesIdentityBasedAuth.DirectoryServiceOptions

#List the directory domain information if the storage account has enabled AD authentication for file shares
$storageAccount.AzureFilesIdentityBasedAuth.ActiveDirectoryProperties
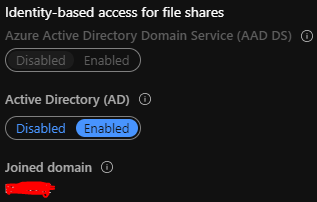
The Azure portal should now also confirm AD integration has been set up correctly as below.
Setting permissions
The next step is to assign RBAC permissions to your Azure files share. This can be done via the Azure portal or PowerShell/CLI and is set at the share level. So if you are setting up multiple file shares in Azure you will need to set this up for each one.
Note that there are three new RBAC roles created for this purpose and these are outlined below. I strongly suggest assigning access to a synced AD security group rather than assigning access on an individual user basis.*
*Note: I found it took a while for group level permissions to propagate fully even though by sync from Active Directory had fully completed. It seems to kick in much quicker if you assign at the user level.
- Storage File Data SMB Share Reader allows read access in Azure Storage file shares over SMB
- Storage File Data SMB Share Contributor allows read, write, and delete access in Azure Storage file shares over SMB
- Storage File Data SMB Share Elevated Contributor allows read, write, delete and modify NTFS permissions in Azure Storage file shares over SMB
Getting connected
Let’s connect to our Azure files share now. For testing we are just going to connect over a public endpoint here but I will cover other more secure options a little later on. If you are planning to use the public endpoint you will need to make sure TCP port 445 is allowed on your firewall and be aware that some ISPs do block this port so you may not even be able to use this connection option.
We can map a network drive through the Windows File Explorer GUI or via a good old command prompt as below and as long as our endpoint is domain joined and we are logged in as a synced user who has been assigned RBAC permissions then we should get authenticated and our drive will be mounted.
net use <desired-drive-letter>: \\<storage-account-name>.file.core.windows.net\<share-name>
Setting granular permissions
We now have access to the share file via the assigned RBAC roles but it’s quite possible you are going to want to have different permissions set for various folders within your share.
Tip: Try to avoid setting permissions on the file level unless you like creating unnecessary admin work for yourself!
Azure files supports NTFS permissions and these work in exactly the same way as they would on a regular on-premises SMB file share.
There is an important step you need to take before you can set the NTFS permissions however. You will have to mount the file share from a domain joined machine with superuser permissions and this is achieved using the storage account key.
The command syntax is below:
net use <desired-drive-letter>: \\<storage-account-name>.file.core.windows.net\<share-name> <storage-account-key> /user:Azure\<storage-account-name>
Once you have mounted the share you can then set the NTFS permissions via Windows File Explorer or through command line as you would on a regular SMB file share.
Let’s ramp up the security
I mentioned earlier that we would be accessing this service over a public endpoint. At the very minimum I would recommend restricting access to your corporate IP address range.
This can easily be achieved by adding your public IP address range to the firewalls and virtual networks section of your Azure storage account. This will take a matter of seconds to configure.

That’s a good start but we are still accessing the share over a public endpoint. We can go one better a use a private link connection however.
Private link connection
This is achieved by implementing a VPN connection and deploying a private endpoint to your Azure storage account. The VPN can be implemented as a site-to-site or point-to-site VPN and you can use the native Azure virtual network gateway or third party network virtual appliance options. Once a VPN is established you map your network drive directly to a private network interface called a private endpoint which is associated to the storage account. This will give you a truly private connection to your Azure files share with full control over access. This also gets around the potential issue of port 445 being blocked by your ISP.
I have managed to get this implemented in my test environment and the procedure for the setup is well documented here:
https://docs.microsoft.com/en-us/azure/storage/files/storage-files-configure-s2s-vpn
Final thoughts
Overall, I was pretty happy with this preview. I was able to set this up fairly easily and secure private endpoint access and restrict access to particular users. I did find that assigning group level access via the RBAC assignments had some time delayed issues but I suspect this is either a temporary limitation or an issue with my own setup.
I expect there will be a lot of interest in this and it will likely lead to an increase in deployments of Azure File Sync as well as this can be integrated with the same Azure files shares and it also preserves existing NTFS permissions synced from on premises.
