
Intro
This will be my first post on DevOps which is something that I, like many others dismissed a few years ago as something “only for developers”. I was first introduced to infrastructure as code (IaC) in the form of ARM templates maybe 3 or 4 years ago and very quickly realised that I could reproduce the same templated deployment over and over again for multiple customers. Although this took a lot of effort to get working correctly, it eventually paid the time back massively for future deployments. Not only was I able to get my infrastructure deployed very quickly, I also knew that I had the same consistent deployment every time.
There was an issue however. Code goes stale. I found over time that I needed to modify my template for a number of reasons such as new feature requirements, updated APIs or quite often just to follow best practice which is something that can change regularly with Azure. This meant I ended up keeping multiple copies (versions) of my templates and had to manually redeploy changes to my customer environments. This was a solo project at the time but I knew that in future it was likely that my colleagues would be assisting me with this which was only going to make managing all of this more difficult.
That’s where DevOps comes in and I became aware of the likes of Azure DevOps and GitHub through various members of the Azure community. Tools I had previously dismissed were now something that I was starting to take an interest in.
The problem here I found was the huge lack of documentation and examples geared towards IT Pros like me. These tools were originally created for software developers to manage and build/release their code and as such all of the documentation and samples were heavily focussed on this area. There were also a lot of new terms used that I was not familiar with, terms like ‘pull request’ and ‘fork the repository’ were all new to me. With help from the Azure community and through just trying this stuff out I have managed to piece together the basics of how to get started with DevOps as an IT Pro.
This post will focus on using ARM templates to deploy to Azure using GitHub. Updates I make to my template will be automatically triggered to deploy to Azure using GitHub Actions.
Concept
I am using ARM templates for deploying to Azure so this is what this post is focussed on. It’s what I know and what I want to continue to use for now at least but this process is certainly not limited to just ARM templates.
Firstly, I need a code repository to store my templates in but then I want to be able to trigger automated deployments to Azure when I make changes to my ARM template. This way I won’t be making future changes to my environment directly in the Azure portal but maintaining my current setup as code. This means I can make this working deployment repeatable should I ever need to redeploy it or deploy the same solution for another customer.
In terms of the automated deployment (this is the CI/CD that so many developers talk about), I will only want this to happen when I update the ‘master’ branch of my code. Otherwise a deployment may get triggered before I have fully tested my code and before it is ready to be deployed to my production environment. Therefore I will create a new ‘branch’ of code that I can work on for my next version of the ARM template.
Finally, when I am ready to deploy my updated ARM template I will create a pull request and merge my code branch into the master branch. This will automatically trigger the deployment via a workflow process using GitHub Actions.
I would recommend using the excellent Visual Studio Code to author your code and push out the code changes to GitHub but I won’t cover this specifically in this blog post.
Sound good? Let’s get started.
The basics
So of course you will need an Azure subscription for the deployment and you will need to have contributor or owner level access to the subscription or at the very least to the resource group where you will be deploying to. You will also need a GitHub account. If you don’t have one then just sign up for a free one on github.com!
The code repository
This post is not going to focus on the actual solution being deployed in Azure so I just took a simple webapp deployment from another GitHub repository as an example. We will be deploying a simple Azure App Service here. The “code” consists of two JSON files, the ARM template for the actual deployment and a parameters file.
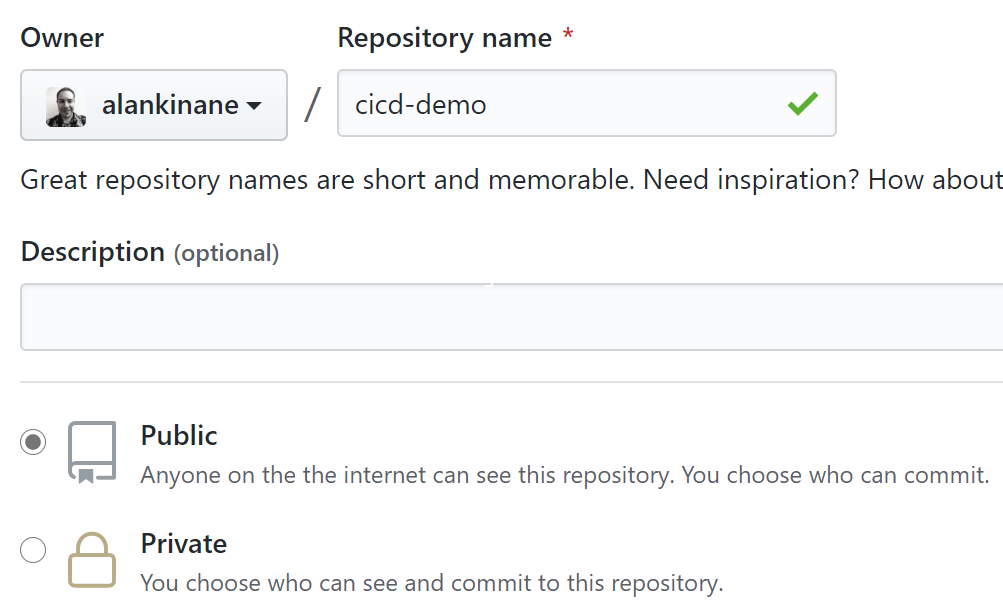
These files need to be deployed in a GitHub repository (or ‘repo’), essentially a storage container for your code. This can either be Public or Private. Public means it’s open source so anybody can access it and this is a great way of sharing your work and assisting others in the community. If it is for a customer however then you are probably going to want to choose a private repository here.
You can choose to create the repo with a README.md file which will give you a file that you can edit describing the contents of your repo and what it is used for. Please do this for your own sake and keep it up to date.
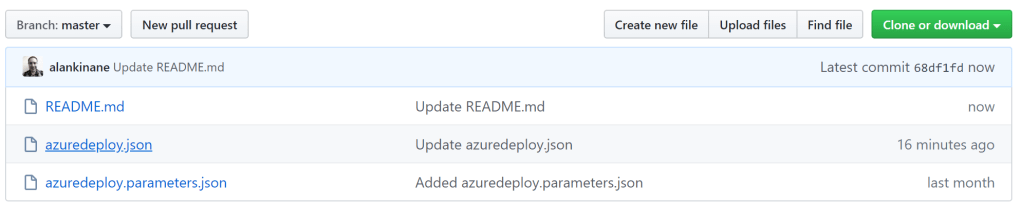
In my case, I had downloaded those two JSON files I mentioned earlier from another repo. I could have simply cloned the original repo in GitHub but you can also just upload your files directly to the repo.
By default, your repo will be created with a ‘master’ branch and this is intended to store the master copy of your working code. At this point my master branch now contains the first version of my code in place along with a README.md file.
The secret identity
In order to deploy this solution to Azure you will need to use an identity with the required permissions to do so. It is recommended not to use a user account here but instead use a service principal with contributor access to the Azure subscription (or resource group). Once you have created the service principal on the tenant and assigned access to the subscription (or resource group) you will need to provide GitHub with the details of this identity. This is very sensitive information so this is where you should make sure of the ‘Secrets’ feature of your repo to store this information.
Secrets are used to store any sensitive information that you don’t want to store in plain text within your code. Hard coded identities and passwords are both a security risk and bad practice from a code maintenance point of view. Repository secrets will keep these details hidden even if you are using a public repo.
The credentials that you will need to store as secrets for this deployment are as follows:
| Credential | Purpose |
| SERVICE_PRINCIPAL_TENANTID | Tenant ID where service principal is created |
| AZURE_SUBSCRIPTION_ID | Azure subscription ID for deployment |
| SERVICE_PRINCIPAL_APPID | Client/App ID of service princpal used for deployment |
| SERVICE_PRINCIPAL_SECRET | Client Secret of service princpal used for deployment |
These GUID IDs can be stored as individual secrets or you can store them as a single secret in JSON format as shown below. This is what I have done and I have called the secret ‘AZURE_CREDENTIALS’.
{
   "tenantId": "<GUID>",
   "subscriptionId": "<GUID>",
   "clientId": "<GUID>",
   "clientSecret": "<GUID>"
}
You will find secrets under the settings section of your repository. Just remember to replace <GUID> with your own IDs.

Workflow pipeline
The next step is to set up the workflow to deploy the solution. This is where the magic happens. In GitHub, just click on ‘Actions’ and ‘New workflow’. You can choose from a starter template if you want. The workflow uses a language known as YAML and this is the part I had the most trouble with as it was completely new to me.
Below you will find my YAML deployment script. As previously mentioned, this is configured to deploy the ARM template whenever there is a new code push to the master branch only.
The steps involved are:
- Checkout the code from the repository
- Log in to the Azure account using the secret credentials we stored earlier for the service principal
- Deploy the template. This is initiated through an inline Azure CLI command at the very end of the YAML file
All of this will run on an Ubuntu container that is provisioned by GitHub just for the build process.
name: DeployJSON
on:
     # automate deployment on push to master branch only and only when ARM template or yaml file is modified
    push:
      branches:
        - master
      paths:
        - ".github/workflows/deploy.yml"
        - "azuredeploy.json"

jobs:
  build:
      # use ubuntu to execute the build
    runs-on: ubuntu-latest

    steps:
      # checkout code from repo
      - name: checkout code from repo
        uses: actions/checkout@master

      # login to azure account with service principal
      - name: Login to Azure
        uses: azure/login@v1
        with:
          creds: ${{ secrets.AZURE_CREDENTIALS }}

      # deploy ARM template with inline AZ CLI command
      - name: Deploy ARM Template
      # define required arguments for AZ CLI command
        env:
          RESOURCE_GROUP: rg-appservice-test-01
          TEMPLATEFILE: azuredeploy.json
          PARAMETERSFILE: azuredeploy.parameters.json
        uses: azure/CLI@v1
        with:
      # Execute AZ CLI command
          inlineScript: |
            az deployment group create --resource-group $RESOURCE_GROUP --template-file $TEMPLATEFILE --parameters $PARAMETERSFILE
Triggering the deployment
As we have configured the YAML file to deploy on code pushes to the master branch then we can trigger a deployment by editing either the azuredeploy.json or the deploy.yml files in the master branch and committing the changes.
This triggers a build which you can monitor under actions. If your build is successful then you should now have an App Service deployed to your Azure subscription. Congratulations!

Branching and merging
Ideally you will not be directly updating the master code branch however.
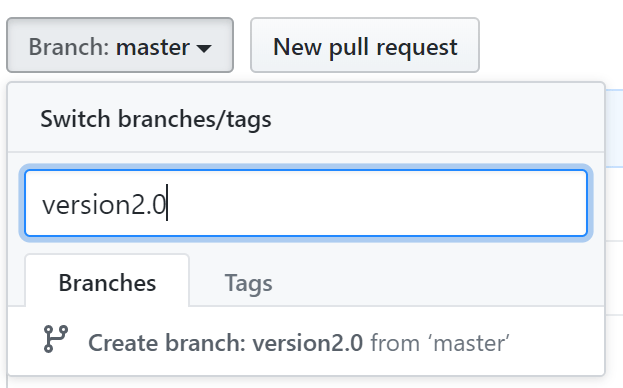
What you should do is to create a new code branch. This branch should become your development environment where you make your code changes and test everything. You can easily create a new code branch by clicking on the branch dropdown and typing a name for your new branch as shown below.
Changes made to this new branch will not auto trigger a deployment and that’s down to this piece of code below in the YAML file.
on:
     # automate deployment on push to master branch only and only when ARM template or yaml file is modified
    push:
      branches:
        - master
Once you have tested your new code and want to push it into production you will create a pull request. This process will merge the new code into the master branch which will in turn trigger a deployment.
Click on the ‘Compare & pull request’ button on your new code branch.

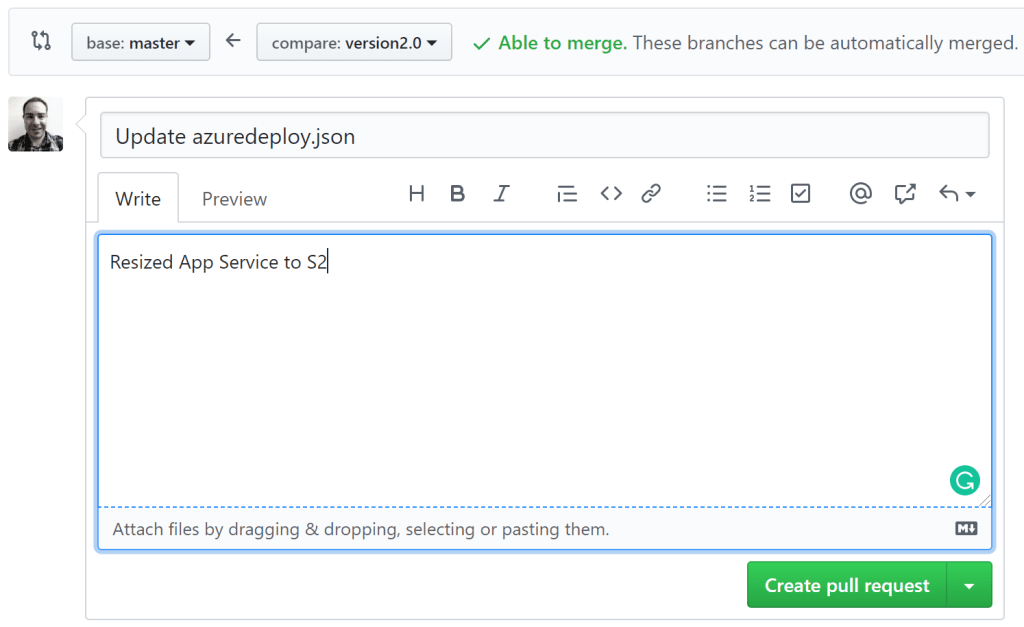
Confirm that you are comparing the correct branches, e.g. version2.0 is being compared to the master branch and write a comment about the changes you’ve made. Then click the ‘Create pull request’ button.
If there are no conflicts then you should now be able to click the ‘Merge pull request’ button.
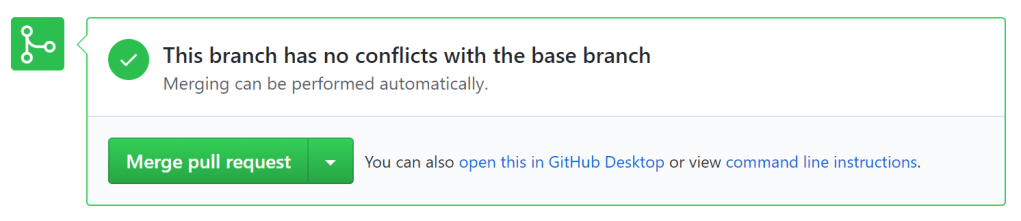
Then click ‘Confirm merge’ to complete the merge process and to automatically trigger the deployment from the master branch.

Conclusion
Change management is very important and applying the same concepts that software developers use to manage, test and deploy their code releases makes a lot of sense for infrastructure as well.
There is definitely a future for Infrastructure as Code particularly in the Enterprise space but it is a whole new skillset for current IT Pros to learn. It will be very interesting to see at what point this becomes the ‘norm’.
Feel free to check out the complete code example used for this deployment on my public GitHub repository here: https://github.com/alankinane/cicd-armdeployment

Greetings, something that was not cleared to my, those steps updated or create a new apim resource in azure ?
LikeLike
No API management resources here. This particular example deploys a new app service resource if it does not exist already and it will update it on subsequent runs of the pipeline.
LikeLike
How can we change the parameters of the resources while deploying the code from UAT TO PROD
LikeLike