
Welcome to part 2 of my well-tempered Azure tenant series for MSPs. In part 1 I covered how to set up your partner management tenant. Now it is time to cover how to onboard your customers to Azure Lighthouse for delegated management.
This is likely to be the longest post in this series as this is the stage where all of the delegated authorisations are put in place to allow you to manage your customers from your management tenant.
Part 2: Customer onboarding
There are two approaches to onboarding.
- You can publish your managed service offering to the Azure marketplace. This can be made available via the public marketplace or privately where you can target the Azure marketplace of your individual customers.
This option has some additional requirements for the partner as you need to have attained the silver or gold cloud platform competency and have access to the commercial marketplace in order to publish your offer. - You can create an ARM template with your offer details and delegated authorisations. This is a much quicker approach and allows you to onboard your customers very easily and even in an automated manner if you have sufficient access.
We will cover this second option in detail here.
ARM template
What we need to decide here are the security groups and RBAC roles that we want to authorise for access to our customers. This was covered in part 1 of this series so hopefully you have your groups in place already and have your RBAC roles decided.
We will need to delegate these security groups to our customers at either subscription or resource group level. There is no support for management group delegation for Azure Lighthouse currently so each subscription needs to be onboarded separately.
If required, you can use different ARM templates for different customers as perhaps some customers will have more bespoke access requirements but quite often you will likely just use a general purpose ARM template that you can use for every customer.
In order to create your ARM template, you may choose to use the Azure portal experience to help simplify this process. This template can be modified afterwards with any changes required.
You will find this template generator within the “My Customers” section of Azure Lighthouse in the Azure Portal.
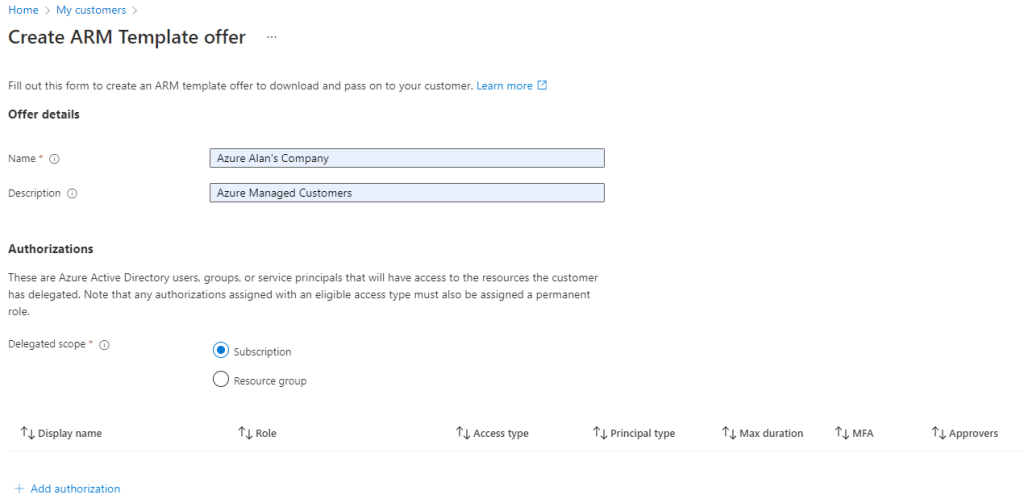
The first part of the template is to choose an offer name and description. This will represent your MSP’s organisation and service offering and will appear on the customer subscription under the “Service Providers” section in Azure Lighthouse. We will choose to delegate access to an entire Azure subscription in this example.
In the next section we set up our authorisations which really is the access delegations for our security groups. You can add as many different authorisations as needed here depending on how granular you want to be with your access delegations.
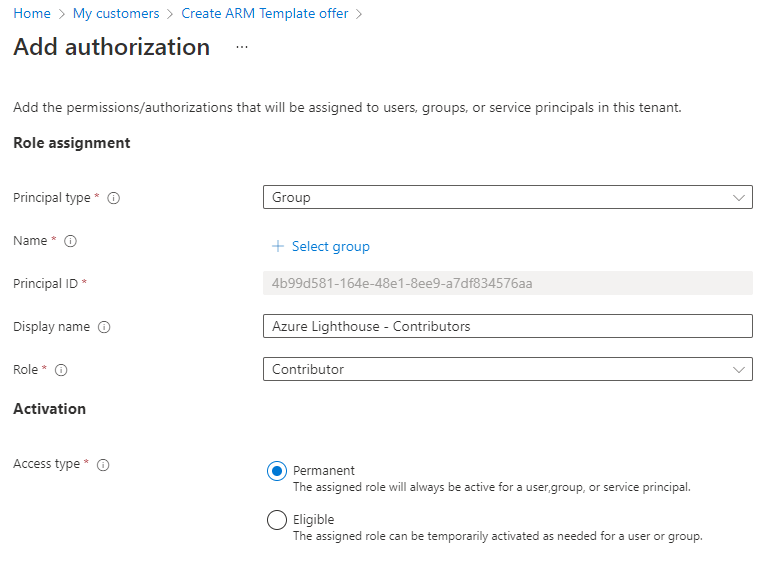
Authorisations
For each authorisation, we just select the appropriate security group on our management tenant and the RBAC assignment that we require. We also have the option of assigning this level of access permanently or to make the members of the group eligible for access on demand. This feature uses Privileged Identity Management to allow for just-in-time access. This feature requires some specific license requirements – namely Azure AD Premium P2.
As mentioned in part 1 of this series, at a minimum I would recommend adding at least two security groups. One with ‘contributor’ access and another with ‘reader’ access.
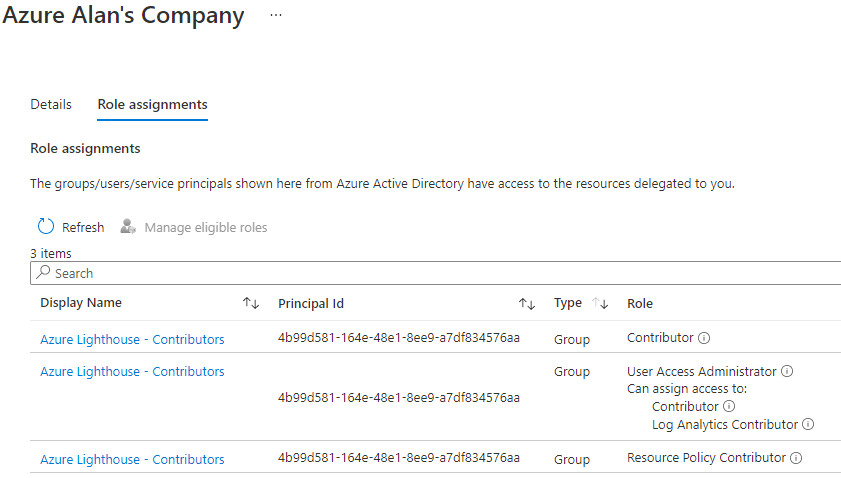
In addition, I would also recommend adding the below assignments to your full access/contributors group as this will allow you to deploy and manage Azure policies including managed identities for policy remediation tasks to your customers later on.
One other thing to note is that Azure Lighthouse does not currently support delegated ‘Owner’ access, so you can’t grant your accounts with authorisation to make RBAC changes on your customer tenants. This must still be performed directly on the tenant using an ‘Owner’ account.
Once you’ve added all of your authorisations, you will then be able to view and download the ARM template. This is just a text file in JSON format so any manual changes that need to be made can be done via a text editor – I recommend using VS Code.
Time to onboard
To onboard your customers, you will need to deploy this template to each Azure subscription in your customer tenant. This can only be performed with an account that has an ‘Owner’ RBAC assignment on the subscription as this is required to add the required delegated authorisations.
I find the most convenient way to approach this is by using PowerShell either from your own device and first authenticating to the customer tenant using the command:
Connect-AzAccount
…or else by using the CloudShell in the Azure Portal and uploading your ARM template via the CloudShell.
Either way, your next step is to first make sure to select the Azure subscription where you want to deploy your template.
Select-AzSubscription -SubscriptionId <subscriptionid>
Then deploy the template by supplying a name for your deployment, an Azure region and the name of the ARM template JSON file.
New-AzSubscriptionDeployment -Name <deploymentName> `
                 -Location <AzureRegion> `
                 -TemplateFile <pathToTemplateFile> `
                 -Verbose
The deployment usually takes about 30 – 60 seconds to complete.
Once this completes you should have delegated access to this Azure subscription within a few minutes.
A few points here:
- Remember this process needs to be repeated for each customer subscription so if your customer has more than one Azure subscription then you need to select the subscription ID and run the deployment for each one
- If you decide to make any changes to your authorisations then you will have to modify the ARM template and re-deploy it to each subscription for every customer, so it’s worth planning this process out thoroughly in advance of your deployments
Accessing your delegated customer resources
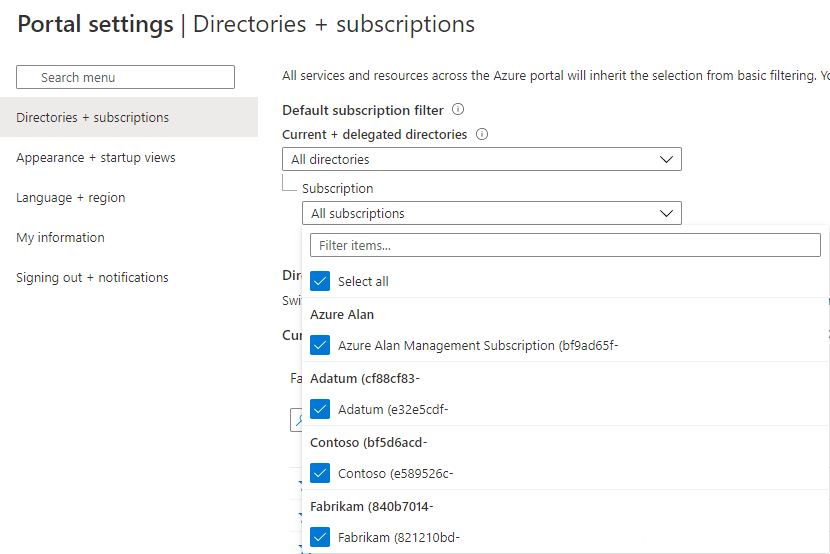
With your customers onboarded, you will find these delegated tenants and subscriptions are now available in the subscription filter of your management tenant.
Some quick tips:
- If you don’t see these immediately after onboarding then just wait a few minutes and perhaps log out and back into the Azure portal as well. You must also be a member of one of the security groups that you delegated access to
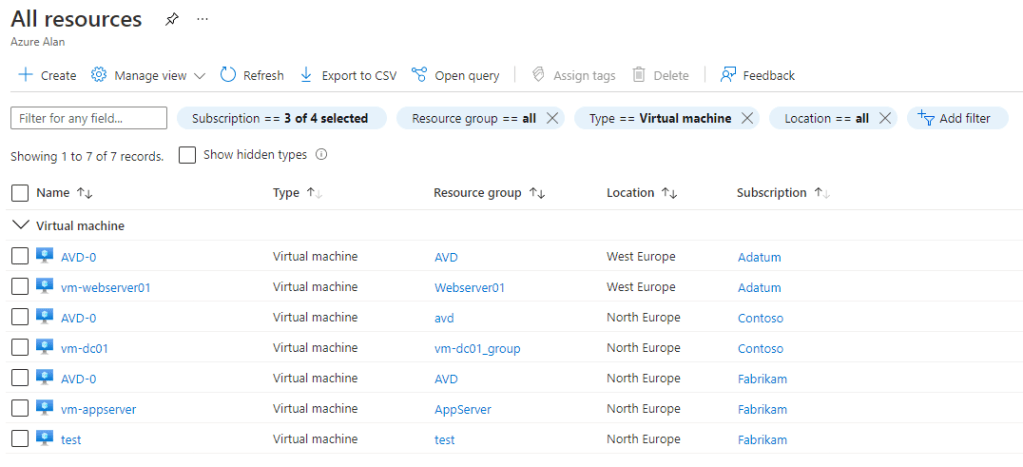
- If your customer subscriptions all have generic names like ‘Microsoft Azure’ or ‘Azure subscription 1’ then I suggest that you should rename these. I recommend to include the customer name as part of your naming convention. This will make resource management much easier later on as you can easily distinguish between your customers by the subscription names
You can now manage all of these delegated resources from a “single pane of glass” view in your management tenant.
Note how I renamed the subscription names after the customer below.
What about Azure Blueprints?
Azure Blueprints are a great way to create a landing zone for your customers, especially if they are only starting out with Azure. By using an Azure Blueprint you can pre-configure your customer’s Azure environment with RBAC assignments, assign Azure policies and also deploy resource groups and ARM templates.
This is a great way to lay down governance as well as security and architecture frameworks and it’s always best to do this at the start before any resource deployments have commenced.
As an MSP, you may wish to use Azure Blueprints for your customers and wouldn’t it be great if these could be deployed through your Azure Lighthouse authorisations?
Well, the good news is that it can be, but it takes a little extra effort first.
I would like to reference this excellent post by Wesley Haakman here that explains in detail how this is possible.
Following Wesley’s recommendation, we can deploy a user-assigned managed identity to our customer tenant and by granting this the necessary ‘Owner’ RBAC authorisation we can later use this managed identity to deploy Azure Blueprints from the comfort of our management tenant.
The best time to do this would be at the Azure Lighthouse onboarding stage as we will need to be signed in with an ‘Owner’ account for this purpose anyway. The below script based on Wesley’s example will perform the necessary deployment and can be run before or after the Azure Lighthouse deployment.
Install-Module -Name Az.ManagedServiceIdentity

$uamiRG = "<resource group name for managed identity>"
$uamiName = "<managed identity name>"
$location = "<azure region>"
$subscriptionId = "<subscriptionid>"

Select-AzSubscription -SubscriptionId <subscriptionid>

New-AzResourceGroup -name $uamiRG -location $location

$uami = New-AzUserAssignedIdentity -ResourceGroupName $uamiRG -Name $uamiName

Start-Sleep -Seconds 10

New-AzRoleAssignment -ObjectId $uami.PrincipalId -RoleDefinitionName "Owner" -Scope /subscriptions/$subscriptionId
This will then give you the option to select the user-assigned managed identity that you deployed to your customer tenant and allow you to fully deploy an Azure Blueprint to an Azure Lighthouse delegated subscription from your management tenant.

What’s next?
Now that we have onboarded our customers, it’s time to start looking into what we can do with Azure Lighthouse to make our customer management tasks easier.
First up will be managing Azure Backup in part 3.

2 thoughts on “MSP: The well-tempered Azure tenant – Part 2”